
3.6 Stitching
In this tutorial, we will stitch the panorama with Autopano Giga. We will start with the normally exposed images without using all brackets. We will then create a QuickTime VR with pano2VR, which allows us to pan around in the panorama and take a closer look at the stitching quality
Organizing Files
Align Brackets
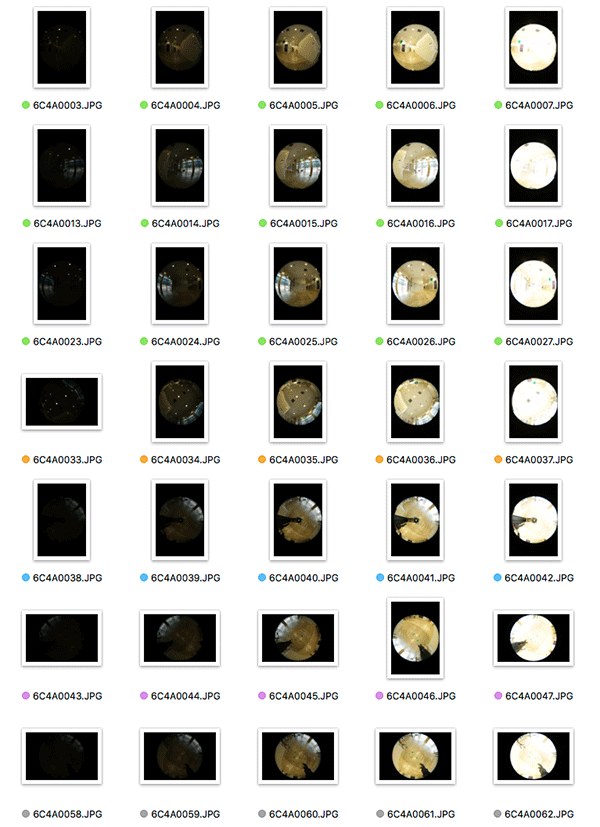
Before importing images, sort them first
Use icon view and adjust window size so all brackets are nicely aligning
Check that everything you need is there, move outtakes away
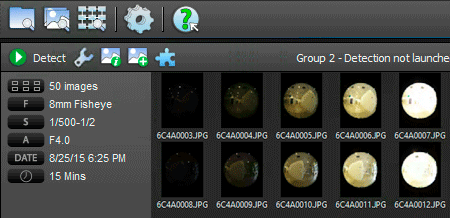
Here are 5 brackets for
3x horizontal
1x up
1x down (With tripod in the center, should be 2 shots actually)
2x extra floor (With photographer’s legs)

Folders
I’ve organized my files into folders: 1stop is the normal exposure copied over from brackets folder, floor-extra are additional floor outtakes
Autopano Settings
These are global settings affecting all coming stitches
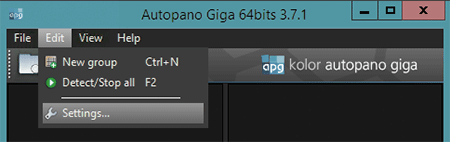
Open Settings
Preferences on Mac

Select Detection page
Set Global Settings
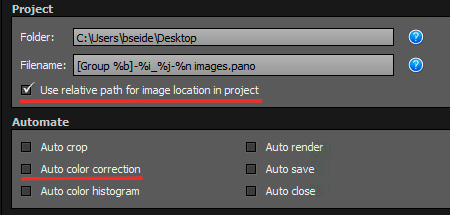
Use relative path: Enable
Auto color correction: Off
Stitch One Bracket First
To test which floor shots work and which don’t, it’s easier to start without all brackets but with 1 exposure set only
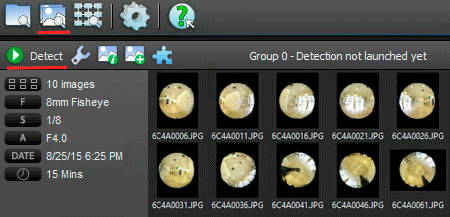
Import and Detect
Import normal exposure set, without all brackets
Select Images to import
Detect to auto stitch panorama

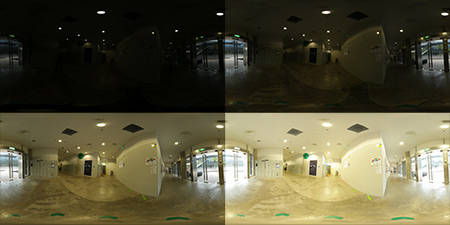
Stitch Rough Blend
What you see is just a rough blend. The Preview is in the Edit View
Also, check Color Correction and RMS
Preview and Edit View
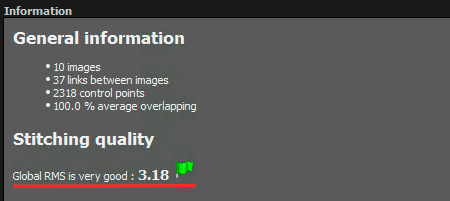
RMS Error value
First, check the RMS error value
Green flag, good
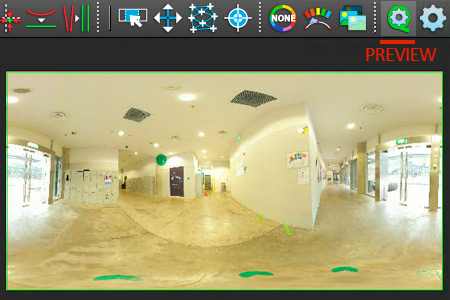
Preview
Hit Preview – Looking much better
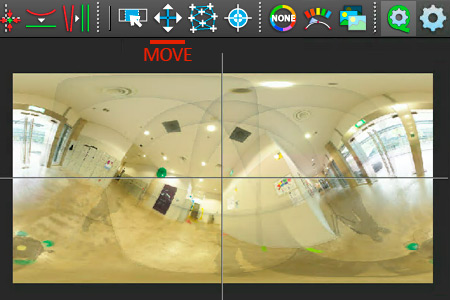
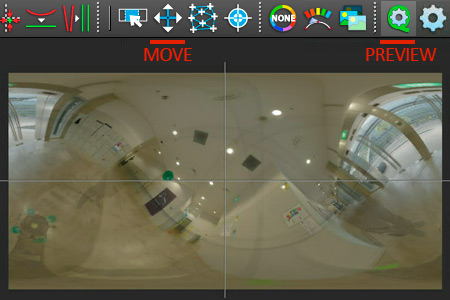
Horizon
If horizon is not leveled, use Move Tool, grab picture and move to adjust
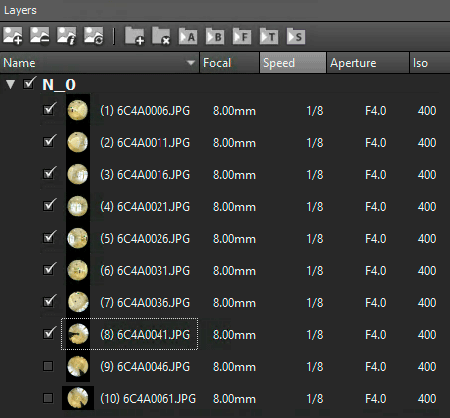
Layer
If result shows unwanted artifacts, i.e. from floor handheld shots, visit the Layer View
Try several combinations of floor shots by disabling and enabling
Save and Render

Save first, then Render
Save stitch setup with meaningful name
Render output will use that name

Render Settings
Output Size: Set to 50% to reduce render times, not for final render
Blending Preset: Anti-Ghost
Format: JPEG or TIFF (Both support EXIF)
Exported Data: Panorama for the first test
Layers for the final bracket render
Output: Strongly recommended to save stitch setup first. Render output will use the setup name – as it always should be

Output
You’ve stitched your equirectangular panorama
Congrats! Let’s convert to QuickTimeVR and pan around, and check the stitching quality
QuickTime VR
I’m using Pano2VR to convert the panorama image to a QuickTimeVR
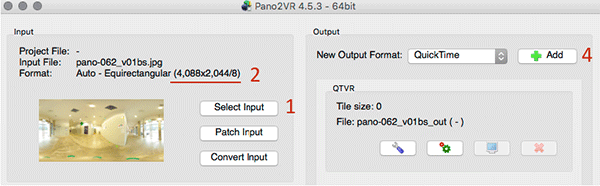

Create QuickTime
1. Select Input
2. Confirm image ratio is exactly 2:1. One missing pixel and QuickTime won’t work. Fix in Photoshop if needed
3. Save Pano2VR setup
4. Add QuickTime, deselect HTML in QuickTime window
Enjoy the QuickTimeVR and pan around to check for stitching errors
If you’re happy with the overall stitching quality, move on to Stitching the Brackets
If quality is not good and detailed high quality is needed for close-up reflections, jump to section Improving Stitch
Stitching Brackets
Stitching the normal exposure went well, let’s move on to stitching all brackets
Import
Repeat the Import, now with all brackets

Create Stacks
Select all images > right-click > Create stacks by N…
This will group exposures by shots
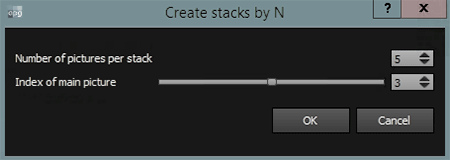
Number of exposures / brackets
Index of main picture:
My normal exposure is image 3

Rough Blend
Hit Detect and wait for the rough blend
Preview is in Edit View
Also check Color Correction is None

RMS Error value
First check is RMS error value
Green flag, excellent
Preview and Horizon
Preview the stitch
If horizon is not leveled, use Move Tool, grab picture and move to adjust

Layer View
If result shows unwanted artifacts, i.e. from floor handheld shots, visit Layer View
Try several combinations of floor shots by disabling and enabling all exposures of one shot
Group by Stacks will sort by exposure, but still requires you to open all groups
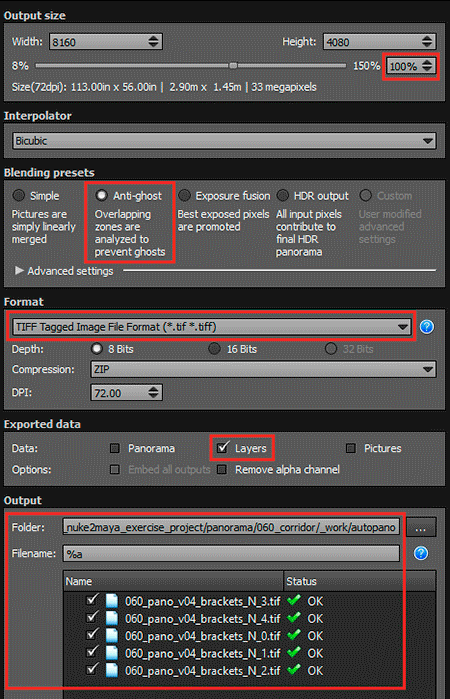
Render Settings
Save stitch first, then render
Output Size: Set to 100% for final render
Blending Preset: Anti-Ghost
Format: JPEG or TIFF (Both support EXIF)
Exported Data: Layers for final bracket render
Output: Strongly recommended to save stitch setup first. Render output will use the setup name – as it always should be
Output
We’ve rendered one Layer for each exposure
Improving Stitch
There are several ways to improve the stitch quality. We can dig deeper by adding manual control points with the Control Point Editor or even masking out regions with the Mask Tool
Optimization
Older Autopano versions have manual optimization settings
Edit view > Control Points Editor > Optimization Settings > Optimizer Stages: Lower the value of Keep only control points below this error
Then still in Control Points Editor hit Optimize
Leave Control Points Editor and check in General Information if Global RMS has improved
Control Point Editor
We can add control point pairs for 2 overlapping images if we feel that the automatic detection missed obvious and important features. This can become a time-consuming effort, hopefully, you won’t need it. I would rather re-shoot with more images if possible
Edit view > Control Points Editor
Select an image pair in the Current Link View. The idea is to find a pair which has too few common control points and too high RMS error values

Control Points Editor
Use Add auto control points to drag shape over same features in image pair
Use Add manual control points to position a cross-hair over same features in image pair
Use Quick Optimization to evaluate new control points
Finally, use Optimize to recalculate and check if RMS improved
Video tutorial Control Points Editor from Kolor on YouTube