
4.1 Camera Tracker in Nuke
This guide will walk you through the basic setup of the Camera Tracker in NukeX

Preparing Footage
If your footage is a video file such as MP4, it’s recommended to convert to image sequence first
Image sequences are reliable, the conversion is fast
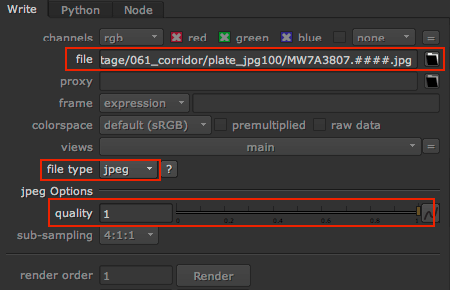
Write JPEG Sequence
Copy the name of the source footage and add .####.jpg
Set the JPEG quality to 1
Unless you’re dealing with a grainy low-light shot, JPEG is ok for tracking

Project Settings
Edit menu > Project Settings or Hotkey S
Before we start, confirm your Project Settings
Size and range follow your footage, frame rate your global project settings
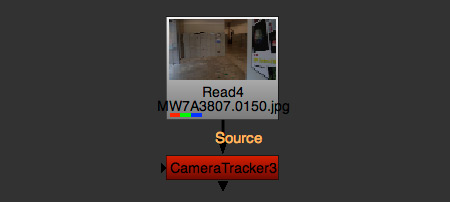
Camera Tracker
Add the Camera Tracker node
NukeX required

Tracker Setup
Range: Global is the range of Project Settings
Use Custom if you don’t want to track the entire range
More frames will take longer but often give better results because we get more information
Lens Distortion: Set to Unknown Lens and tick Undistort Input
Film Back Preset: This is important to set correctly. Google Image Sensor Size of your camera, a smartphone camera is just a few millimeters
I shot on Canon 5D MarkIII

Refining Settings
Open the Settings tab
Tick Preview Features
Number of Features: I pushed them up
Detection Threshold: If too many features are in clouds or other areas making little sense, bring the value up and monitor
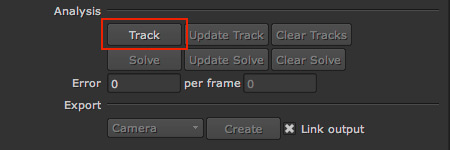
Track
Hit Track to start tracking, this may take a while
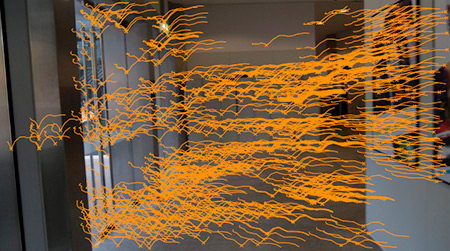
Track Result
Our result shows enough long tracks
If you expected more or different features, first re-visit the Number of Features and Detection Threshold and track again
Or you could also add UserTracks

Solve
Next, hit Solve to start the camera solving

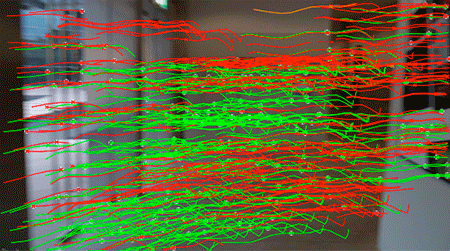
Solve Result
The result shows the track trails indicating length and quality
green (good)
orange (maybe)
red (rejected)
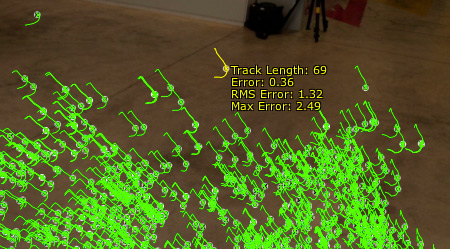
Solve Result Detail
Detail information of individual tracks by hovering over one

Error Value
Error under 1 is great
Between 1 and 2, I will continue and test closely
Over 2, not good, definitely visit Improving Solve section further below

Export Scene+
Tick Link output, Select Scene+ and Create the scene

3D Scene
We get a basic setup with the 3 nodes every Nuke 3D scene needs: Scene, ScanlineRender and Camera
In addition, we also get: PointCloud and LensDistortion
Camera and LensDistortion are linked to CameraTracker node

Navigate the Scene
Connect the Scene node to the Viewer, should automatically switch to 3D view, else use TAB key to toggle or View Selection drop-down
If you’re lost, select Camera, hit hotkey F in viewer
Most important hotkeys are:
MMB (or Alt+LMB): Translate Viewer perspective
Wheel (or Alt+MMB): Zoom Viewer perspective
Ctrl+LMB (or Alt+RMB): Rotate Viewer perspective
List of all Nuke Hotkeys > 3D Viewer
Improving Solve
Adjusting AutoTracks can improve the overall Solve Error value. Based on track length or error values, you can specify which tracks contribute and which should be rejected
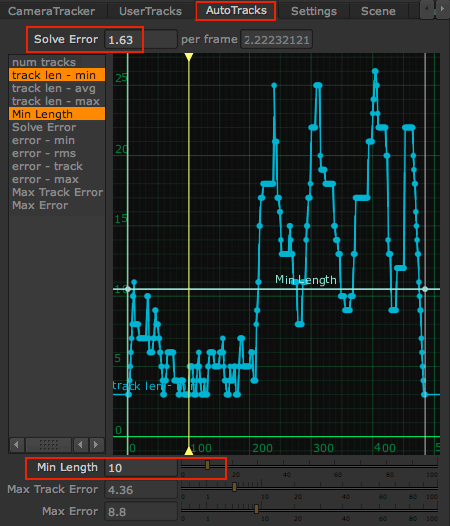
Min Length
Open AutoTracks tab
Check your current Solve Error
Select pair track len – min and Min Length
Use Min Length slider to cut off values, while monitoring result
Monitor Result
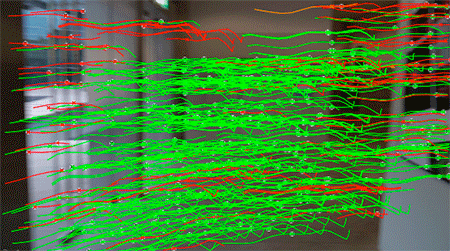
While moving the Min Length slider to cut-off values, the rejected tracks turn red

Max Track Error
Select pair error – rms and Max Track Error
Use Max Track Error slider to cut off values
Again, monitor which tracks turn red and will be rejected
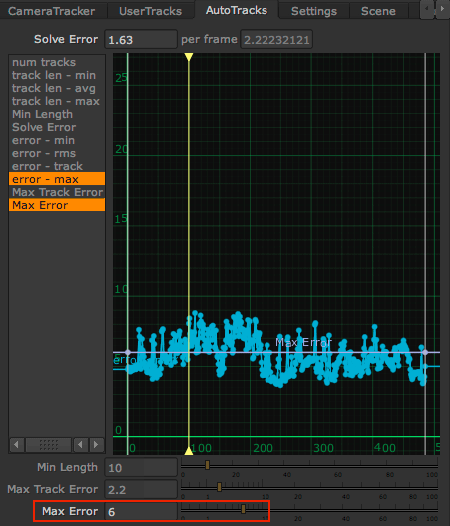
Max Error
Select pair error – max and Max Error
Use Max Error slider to cut off values
Monitor which tracks turn red
Monitor Result
A lot of tracks turned red, do we need any of these urgently? Did we cut-off too many?
Shuffle through the clip and double-check that enough green tracks are left at all times

Delete Rejected
To trash all red tracks for good, use both Delete Unsolved and Delete Rejected
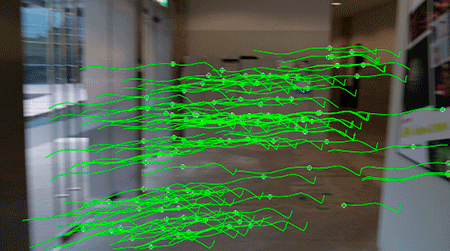
Monitor Result
The immediate effect: All red tracks are gone

Solve Error Value
Check the Solve Error value: Down to 1.22
Hopefully, this helped to improve your track