
3.8 Retouch and Color
What is the best way to retouch the floor, and what kind of color corrections should I perform on an HDR for the lighting purpose? We will also look into creating undistorted images from fisheye shots
Color Correction
If you need a color correction at all, depends on what you plan to do with the HDR. If used for reflections, you might want a color correction to get more control over how the reflections will actually look
If the HDR is purely used for lighting the scene and reflections are not important, a color correction is likely not necessary
Trap: Do not use the HDR Toning in Photoshop; this would result in an LDR – Low Dynamic Range – non-32-bit image. Use the HDR Toning only to create a pretty JPEG for other purposes than our VFX pipeline
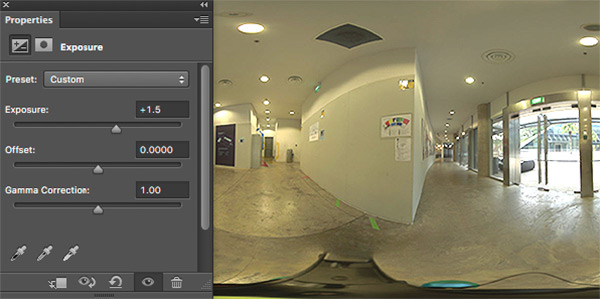
Exposure correction
To compensate for high Preview Exposure margins, simply add an adjustment layer and change the exposure
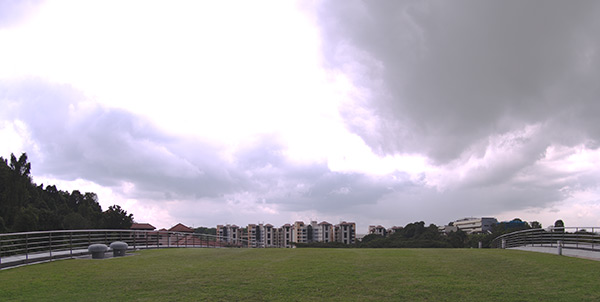
Color Correction Example
This is an original uncorrected HDR
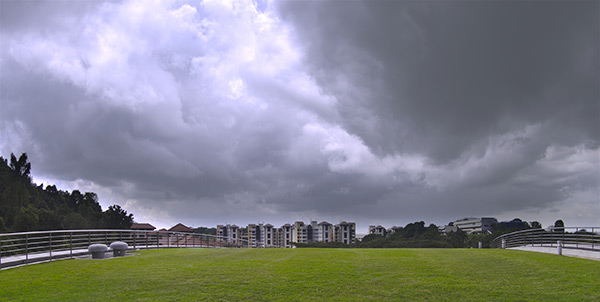
Color corrected
Color correction applied, looks nicer, but for the IBL lighting process it’s really bad
We need to retain high values for lighting
Alternatively, use the pretty corrected image for reflections and the uncorrected for lighting
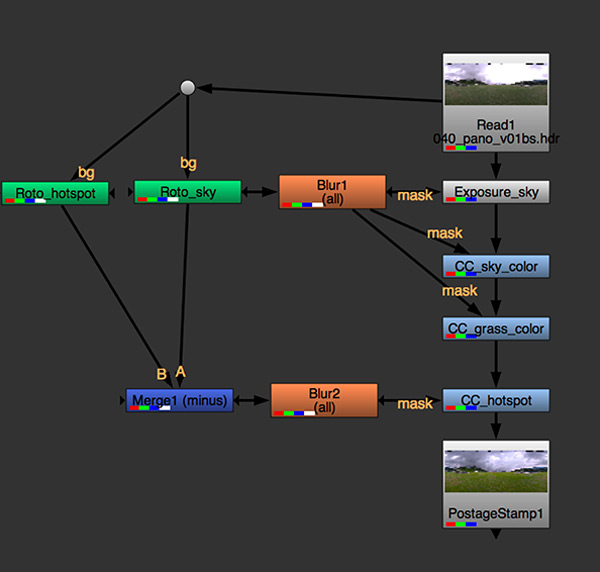
Nuke example
Color correction script in Nuke
Advantage: Retaining the full 32-bit color space
Retouch
Painting out objects such as the tripod or people in the background can either be done directly on the equirectangular HDR or on converted HDR Cube Faces, which, especially for the floor, are more accurate to paint. Relevant here is that you stay in 32-bit HDR space
If you only want a clean floor for close-up reflections, it is usually faster to prepare a clean floor texture for a floor plane. A geometry for the floor is needed in 3D in most cases anyway to cut the lighting from the ground and create occlusion
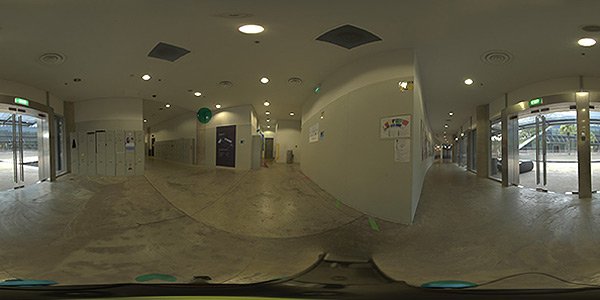
Painting directly on Equirectangular
That’s the fastest way doing retouch
Make sure to keep 32-bit mode in Photoshop
Convert to Cube Faces – Paint – Convert Back
Convert equirectangular to cube faces, paint on cube face, convert back to equirectangular
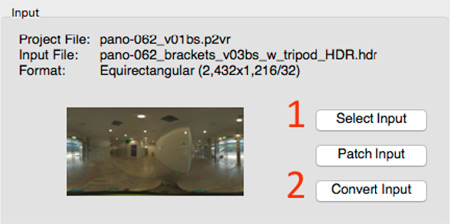
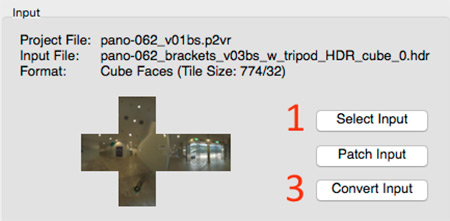
Convert In Pano2VR
Select Input (1)
Convert Input (2)
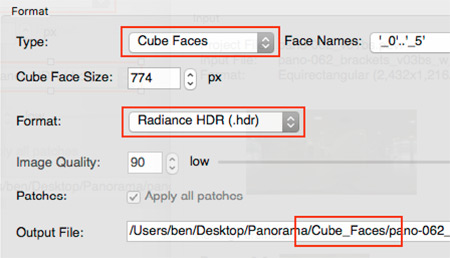
Export as Cube Faces
Type: Cube Faces
Format: Radiance HDR
Output File: Create a subfolder for the 6 files
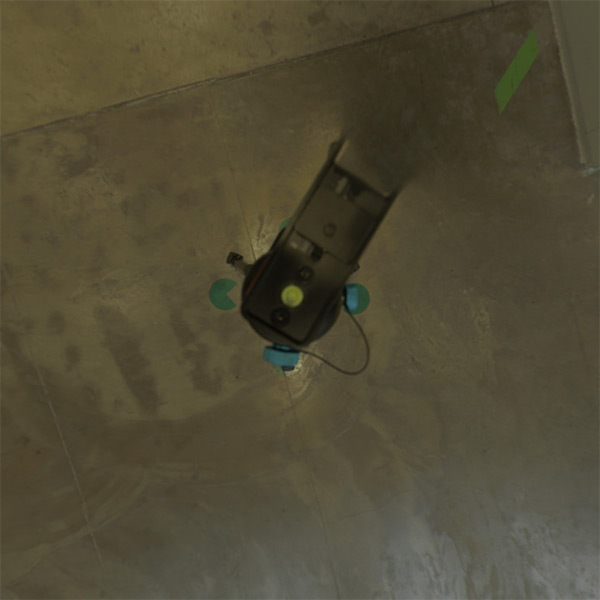
Paint on Cube Face
Here the floor face
Save as Radiance HDR
Add “painted” to name
Patch in painted Cube Face
Pano2VR is so friendly, Input switched to cube faces already
Select Input (1)
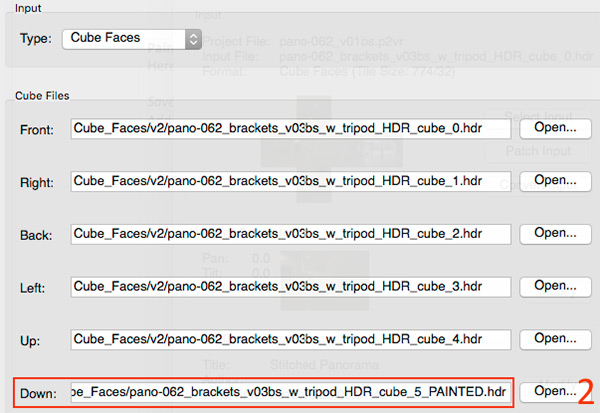
Select patch
Replace the input with the painted cube face (2)
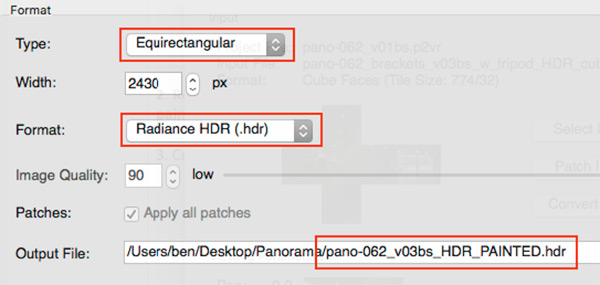
Convert to Equirectangular
Convert Input (3)
Type: Equirectangular
Format: Radiance HDR
Output File: A meaningful name here
Undistort Fisheye
You forgot to take floor photos without the fisheye but want to use a planar floor texture in 3D?
Un-distorting fisheye shots can also help in the retouch process: Instead of painting the floor, a undistorted shot is patched in
If such patching is needed as HDR, the undistortion is better done in Nuke. Sadly, Photoshop’s Lens Correction filter is still not available in 32-bit
Undistort in Photoshop
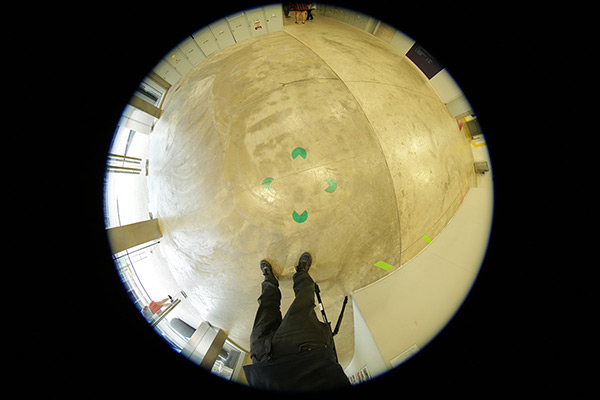
Fisheye shot
Open the original fisheye shot in Photoshop
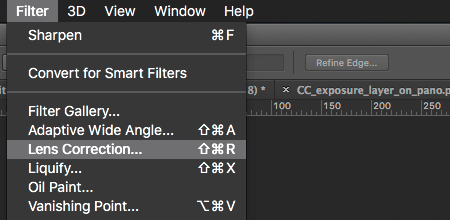
Apply filter
Filter > Lens Correction…
Not available in 32-bit!
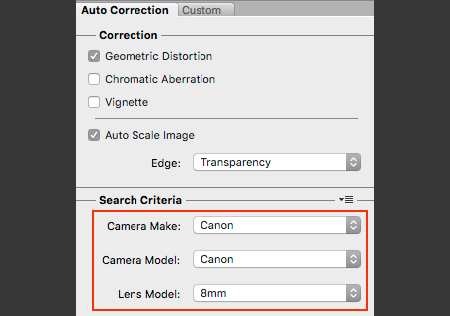
Select Lens
Select camera and lens matching your shot
The photo was shot on Canon 5D Mark III with EF8-15mm fisheye on 8mm
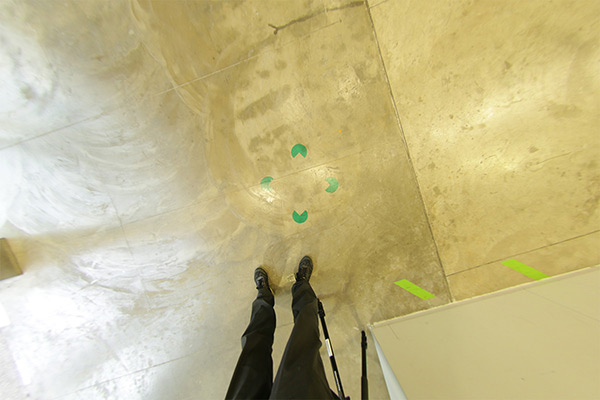
Undistorted Result
The undistorted image can be used to patch an LDR version of the panorama or create a texture for 3D
Undistort in Nuke
Everything in Nuke is 32-bit, so it’s no problem doing the fisheye lens-correction on an HDR
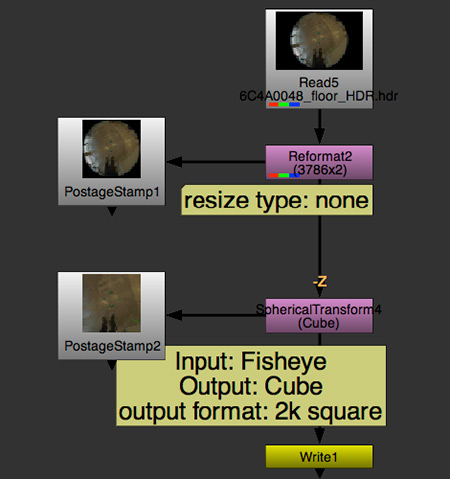
Nuke Example
Nuke script using Spherical Transform to convert to Cube Face
Reformat node crops to square
Spherical Transform converts from fisheye to Cube, outputting square format
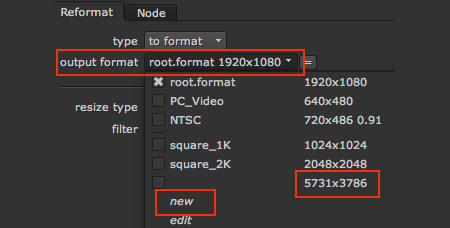
Add Reformat node – Create new Format
In drop-down menu of output format:
Nuke adds every new source size to the list automatically: 5731×3786 is our source file
Select new to create a new format

Create square size
Use source’s vertical size for w and h

Set Resize Type to None
Resize “none” works like canvas size in Photoshop, placing the image inside the format without scaling

Add SphericalTransform
Input Type: 180˚ fisheye
Output Type: Cube
Output format: A square format, i.e. square_2k