
3.7 Merging HDR
In this chapter, we will merge the rendered panorama layers in Photoshop to one HDR file
Import and Merge
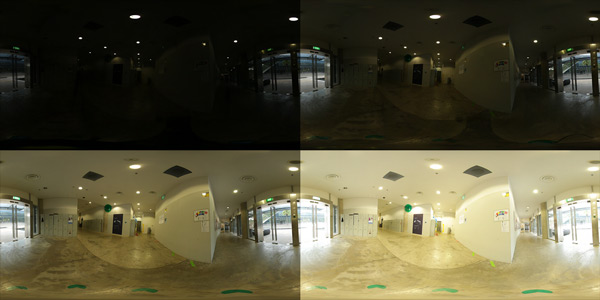
Exposure Brackets
We’ve rendered exposure layers in Autopano

Select Merge
Photoshop > File > Automate > Merge to HDR
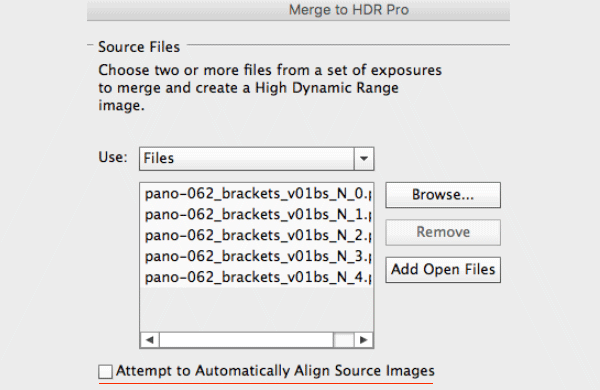
Import the images
Browse to select the images
Disable Attempt to Automatically Align Source Images
Trap: If you’re prompted to set EV values manually, the layers weren’t rendered with EXIF metadata. Re-render as TIFF or JPEG, not PNG
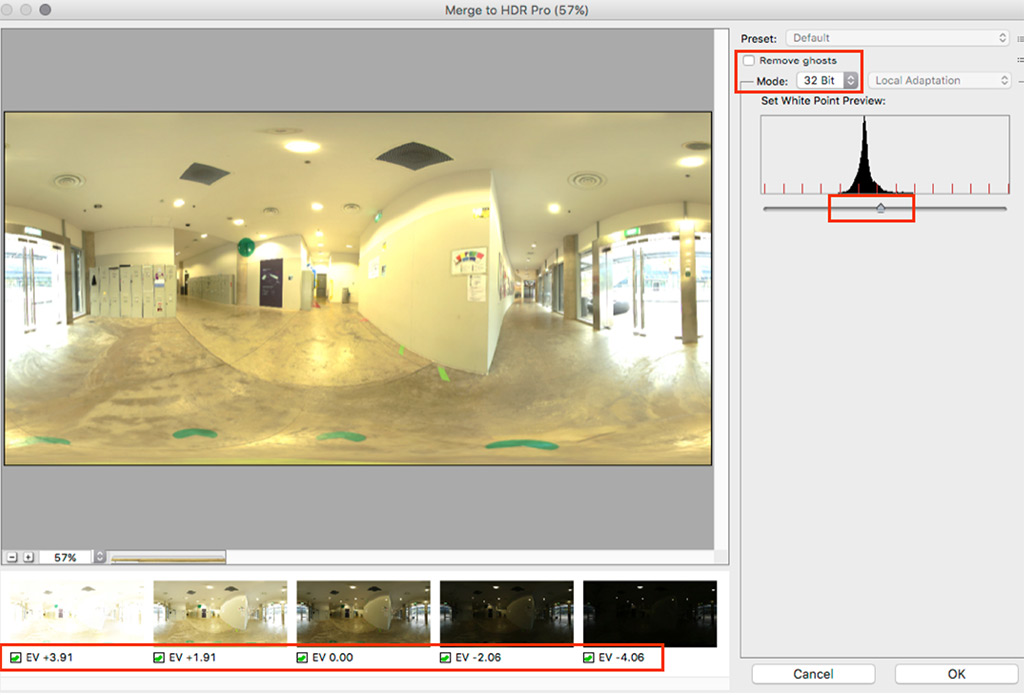
Merge step
This is the Merge interface to set color bit depth, exposure preview or even select which images are used
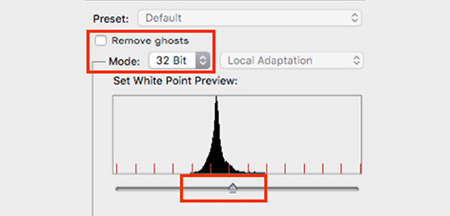
Set 32 Bit Mode
Remove Ghosts: Can improve the result, but also create unwanted artifacts. Usually, leave disabled
Set White Point Preview: Set a preview exposure

Merge Result
This is our HDR. It might feel low contrast with little saturation compared to the normal exposure shot. That’s fine, we are primarily interested in a high dynamic range for the Image Based Lighting
Check the HDR
Lighting will only work well with a true HDR. Make it a habit to always check the highlight values and their dynamic range with the 32-bit preview exposure

Eyedropper to 32-bit
Get the Info box > Click on the Eyedropper
Change display values to 32-bit
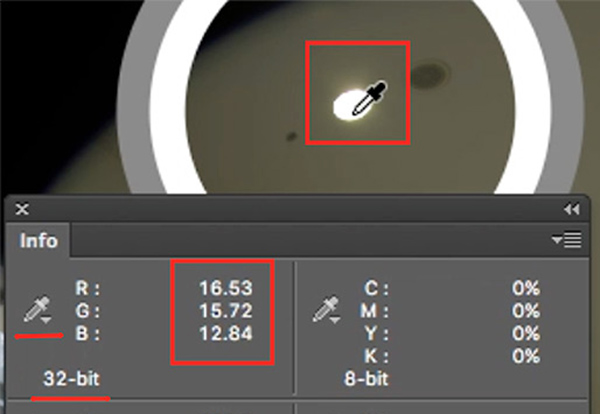
Checking Values
Hover over brightest highlights such as direct light sources
Values should be over 1, ideally much higher, here over 16, great!
Try different highlights. If you can’t find values over 1, it’s not a true 32-bit HDR

32-bit Preview Options
View menu > 32-bit Preview Options
That’s the White Point Preview set earlier
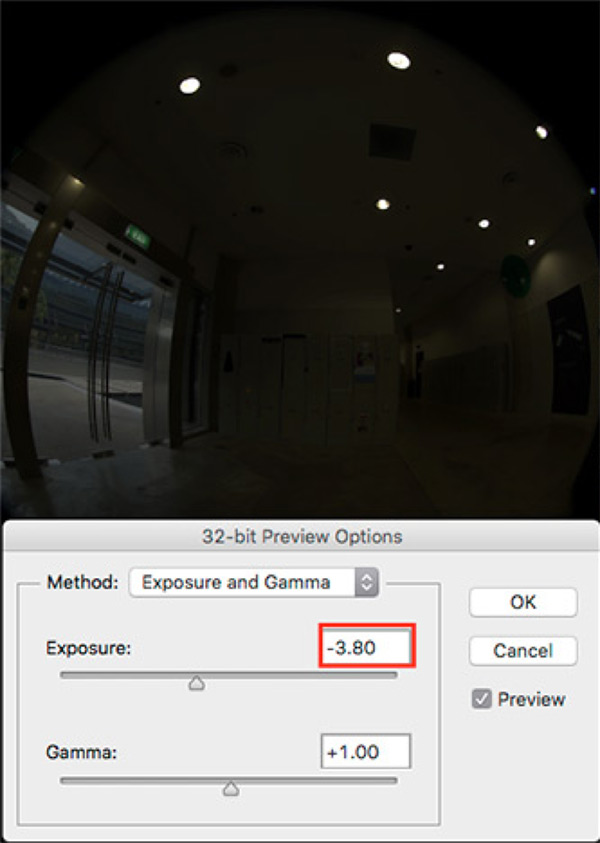
Preview Exposure
Lower the Exposure to the point that only the highlights stay bright. If the highlights darken linearly together with the image, the dynamic range is not good, or it’s is not a true HDR
Next: Find the exposure value closest to normal exposure. If that’s more than +/- 1, compensate later with a color correction
Move slider to 0. We want to save and export with no Preview Exposure
Save and Export
If the Preview Exposure was within margin and is now set to 0, we can move on to export the HDR
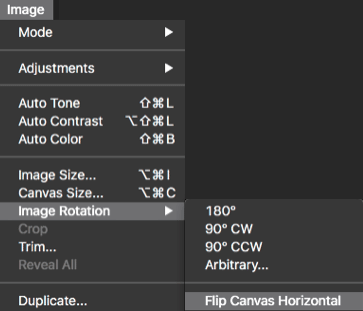
Flip HDR
1. Save Photoshop file
Use a meaningful name, not just HDR_02.psd
2. Flip horizontally
Note: Not needed for Arnold
Image menu > Image Rotation > Flip Canvas Horizontal
3. Save Radiance file
Use a meaningful name, not just HDR_02.hdr