
5.2 Image Based Lighting
In this step, we use our HDR panorama to create a light dome in Maya 2017 and test lighting and materials on new dummy models
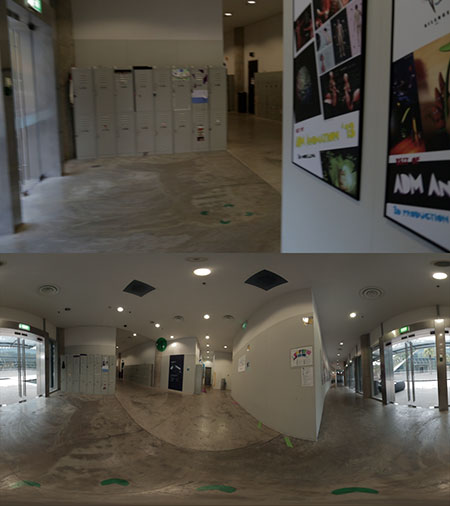
HDR Color Match
The background plate (top) and HDRI (bottom) have been color matched
Exposure and color of HDR can also be adjusted in Maya quite easily

Arnold Renderer
Open Render Settings
Render Using: Arnold
Image format: OpenEXR

Create Sky Dome Light
Arnold > Lights > Skydome Light

SkyDome Attributes
Attribute Editor should open automatically
Click on Out Color checkerboard box

Texture File
Add File texture

Import HDR Image
Attribute Editor > File Attributes
Open HDR image file
Set Color Space to Raw

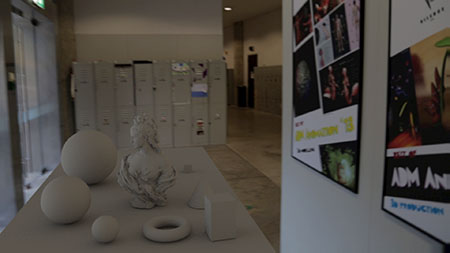
Dummy Objects and Image Plane
Don’t use the Nuke dummies, they are for position reference only. Create new dummy objects, or import your models
The camera image plane is in front of dome in this example

Hide Camera Image Plane
We need the image plane out-of-the-way to see the dome texture
To hide: Nuke camera >imagePlaneShape > Display Mode > None

Rotate Dome
Select aiSkyDomeLight in outliner or viewport and rotate to match the scene. Dome moved up slightly in this example

Render with Default Materials
Open Render View to render the first test
Options > Test Resolution: Set 50 or 25%
Render > Render > Nuke Camera
Render Frame
Light direction is good, a cooler light is coming from the left glass door casting soft shadows to the right of our objects

SkyDomeLight Attributes
Adjust Intensity to match roughly with your background
Increase Samples to remove noise
Set Visibility > Camera to zero to hide dome in render

SkyDomeLight Color
To adjust Color Balance of HDR
file texture > Color Balance > Color Gain

Color Gain
Made a bit warmer by increasing the Red channel

Apply Materials
Apply Arnold aiStandardSurface materials. Plenty of presets available
Chrome, matte finish and plastic are great to assess the lighting

Render with Materials
Metal, glass and self-illumination (emission) added in this example