38.2 Dummy Objects – Scene Scale
Two Viewers
We need two Viewers to see both, the 3D scene and the 2D output of the CameraTracker or ScanlineRender
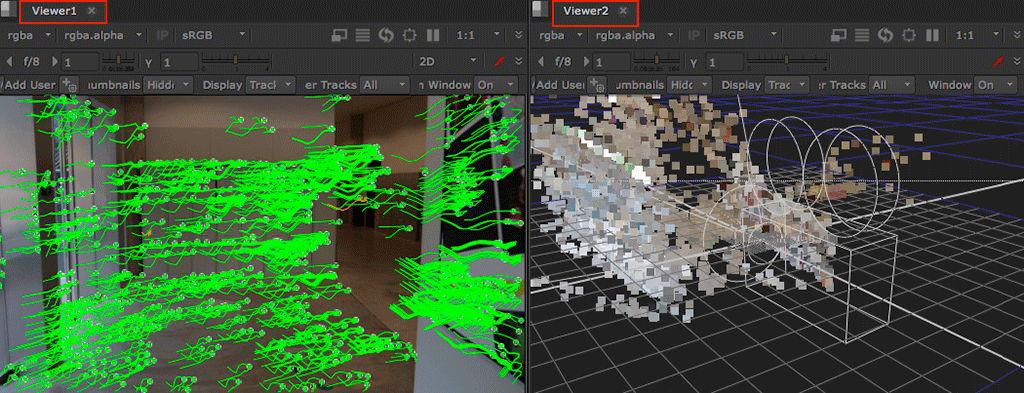
Viewport Icon
Click on the square icon next to Viewer

Split Horizontal

New Comp Viewer
Ctrl+I: Create a new Viewer and move to second window
Setting Ground Plane
We want our scene orientation to conform with how a 3D scene should be set up
Y-axis should be pointing up, and we want our floor tracker points to align as closely as possible to the floor grid in the viewer
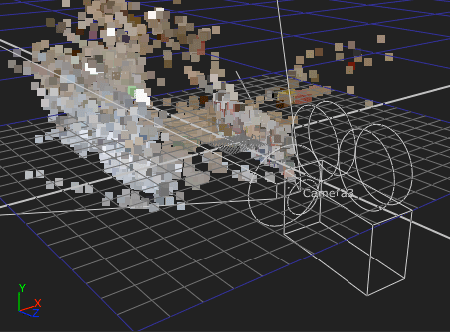
Navigate 3D scene
Move around and get a feeling where points are and which are the ground floor
The X-Y-Z axes make sense here
Y is pointing up
Z is the camera forward direction
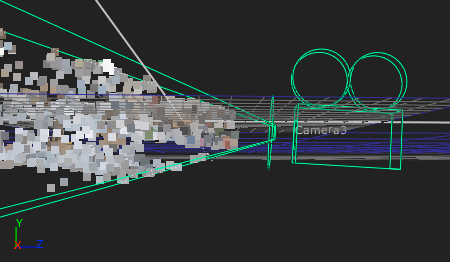
Floor Points and Camera
This doesn’t make sense
Camera and many points are under the ground plane
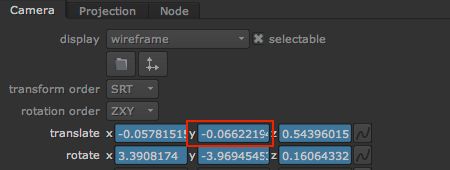
Camera Properties
Negative Y values on Camera position
Can’t be right

Set Ground Plane
- Select tracker points on floor level
- Right-click on one
- Ground plane > set to selected
In case you need to start over, select reset

Check Floor Points in 3D
Navigate around and confirm that ground floor tracker points are now on the viewer’s floor grid
A few points below ground are ok
If the scene orientation makes no scene and things are upside down or twisted, go back to Set Ground Plane, try other points or select reset

PointCloud Properties
display: I’ve changed to wireframe to get a better view of my point cloud
Adding Dummy Objects
Floor tracker points align with the viewer ground grid now, so should a 3D card, which we will add as a dummy for the floor. We will also add a dummy 3D cube and use it to evaluate the scene scale
1 unit in Nuke 3D space = 1 cm
Our goal is to set scene scale to represent real-world values correctly: A 200cm long car in the footage should match a 200 unit dummy box in Nuke. This will help immensely working with 3D models in Maya
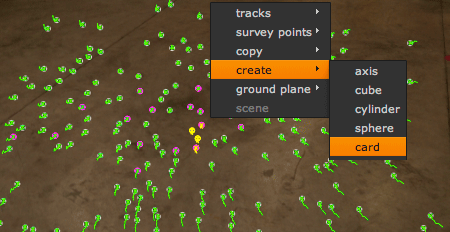
Create Card
- Select tracker points on floor level
- Right-click on one
- Create > card
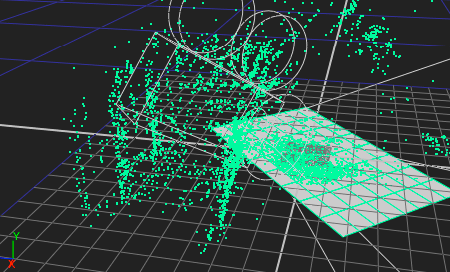
Locate card in 3D
Find the card and confirm it’s on the ground
If you’re lost, select the Camera, hit hotkey F in viewer

Card Properties
Cards are x-y planes, only 2 values are important for us
Y translate: So close to 0, perfect
X rotation: Very good, close to 90˚
If your 2 values are as close, reset ALL values to 0, the card should stay on the ground
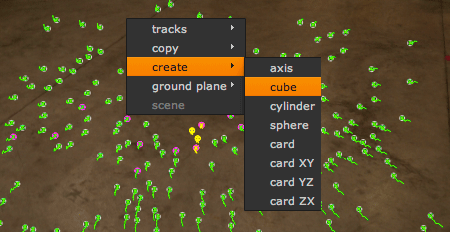
Create Dummy Cube
- Select tracker points on floor level
- Right-click on one
- Create > cube
If card ground plane is perfectly centered at Y = 0 and has no weird rotations, skip this and create a default cube, which will be world origin x-y-z = 0
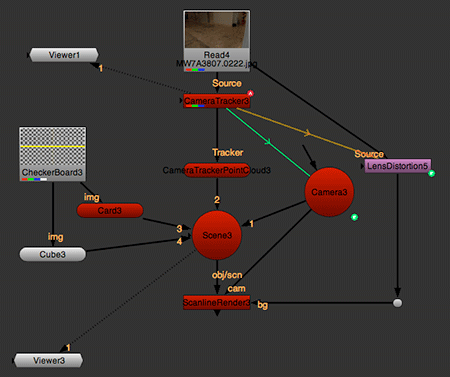
CheckerBoard
I’ve added a CheckerBoard as image texture to both Cube and Card
Card and Cube are connected to the Scene node, in case you haven’t done yet

Locate Cube in 3D
Cube is way to large, not only stuck in the camera but filling the entire room
Default size of cube is 1, and 1 unit equals 1 cm!
That tells us: If our cube feels like 300cm, the scene scale is off by factor 300

Cube Properties
Instead of scaling the cube down to 0.01, we scale up
I’ve reset all values, my cube position was at about world origin anyway
pivot: Half unit down
Y translation: Half unit up, makes lower edge standing on ground level
uniform scale: value in centimeters
Cube is now 10cm, if you want 1m, enter 100

Setting Scene Scale
Instead of scaling objects to millimeter size, we scale the entire scene up
Scene tab in CameraTracker node
uniform scale: Scale up while monitoring the render output of ScanlineRender

Scene Scale in Viewer
The cube looks like 10cm
Means my scene uniform scale value is good
If you know the size of real objects in the footage, create dummy objects for them and use as scene-scale reference

Align Floor Card
I’ve aligned the floor to match the edge of the locker
Unfortunately, walls of corridor are not parallel 🙁

Position and Scale Floor Card
Scale and position the floor card
If you have parallel walls, align the floor card edges to confirm perspective works

Floor Card Transparency
Add a Multiply node between texture and card to make the floor half-transparent
Seeing floor texture mixing with original footage makes it easier to check the quality of the track

Multiply Properties
channels: rgba
value: Lower until transparency is good

Review – Quality Control
Finally, time to test-render
Just playing in viewer is not helpful, we need to zoom-in while playing to evaluate the quality of the track
For a first test, render a Flipbook in Nuke
Select ScanlineRender node > Hotkey ALT+F
Happy with result, write out JPEG sequence (Quality 1) and review in DJV player
