4.4 Export FBX and Background
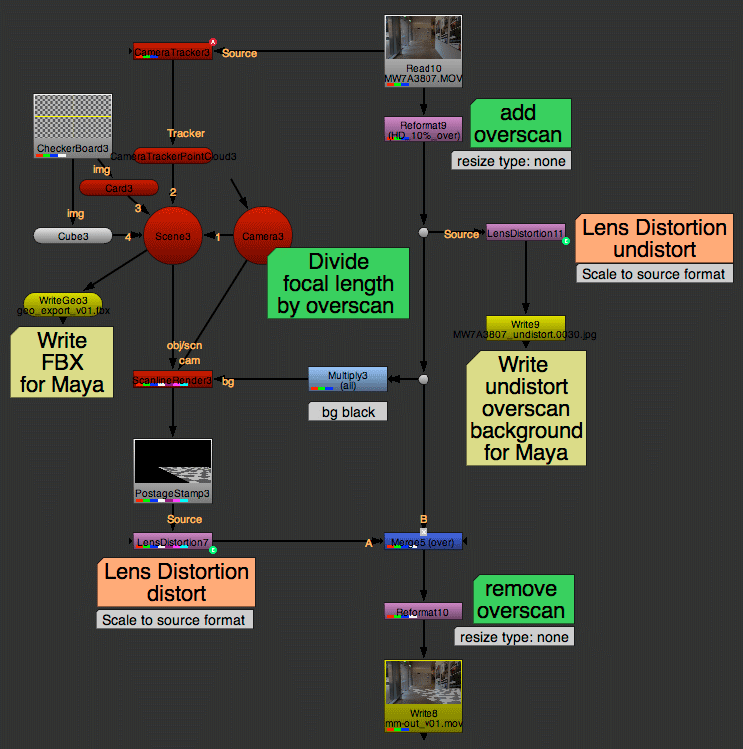
Overscan Overview
We modify our Camera Tracker setup and
1. Add overscan workflow incl. dividing focal length
2. Export undistorted overscan footage as images sequence
3. Export FBX
Expression Arrows (Links) are hidden here, hotkey ALT+E
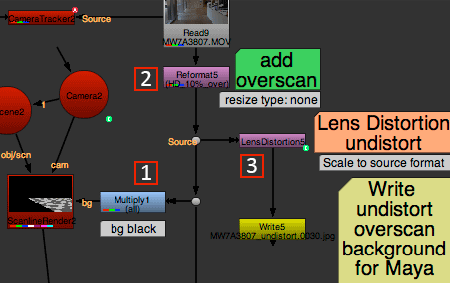
Overscan Step by Step
- Add Multiply to bg input of ScanlineRender
- Add Reformat directly after footage
- Move LensDistortion out of downstream
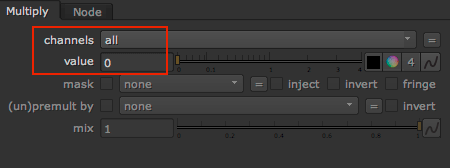
1. Multiply
value: 0 (Black)
We want bg input to receive overscan size only but not the image
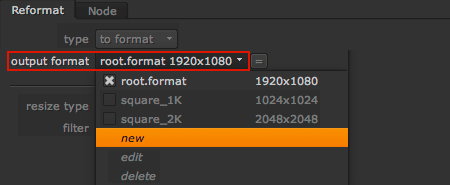
2. Reformat Creating Overscan
In drop-down menu of output format:
Select new to create a new format
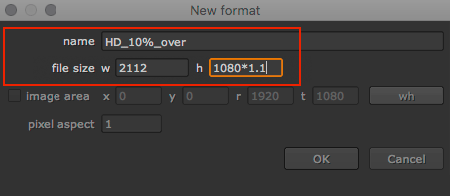
Create size
w and h multiplied by overscan factor
I will create HD+10% by typing *1.1
HD + 10%: 2112 x 1188
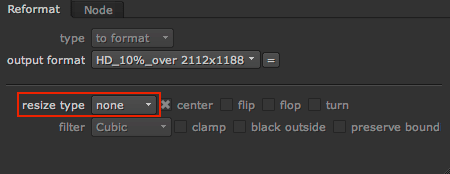
Set Resize Type to None
Resize “none” works like placing image inside format without scaling, only extending canvas size
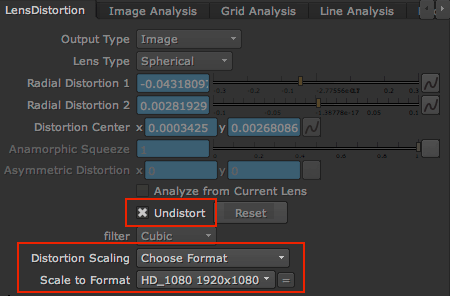
3. LensDistortion – Undistort
Move original LensDistortion out of downstream, only use to export undistorted background for Maya
Confirm Undistort is ticked
Distortion Scaling: Important, select size of the original tracked footage, here HD_1080
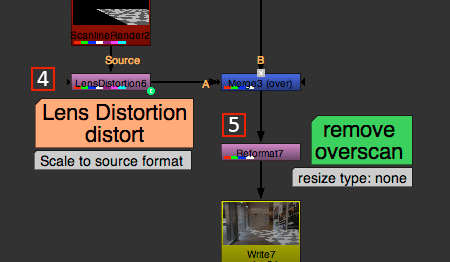
4. Copy LensDistortion after ScanlineRender
5. Add Reformat before output
Also, add merge node if not done yet
Not needed for Maya Export, but without, setup would be crippled
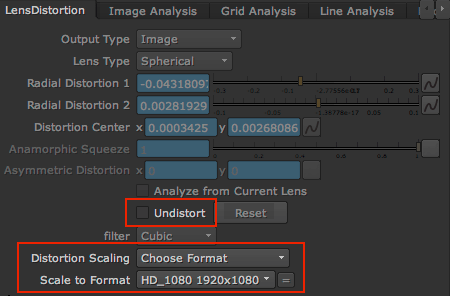
4. LensDistortion – Distort
Copy the first LensDistortion node
Confirm Undistort is NOT ticked = Distort
Distortion Scaling: Size of original tracked footage, here HD_1080

5. Reformat Removing Overscan
output format: Size of original footage, here HD_1080
resize type: none ( =crop)
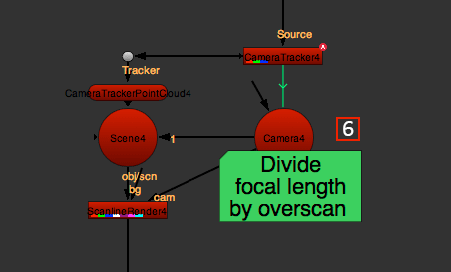
6. Select Camera
We need to divide the focal length. Dividing means zooming-out to cover the overscan area
The green connection to CameraTracker is the Link, we need to remove the link for focal length
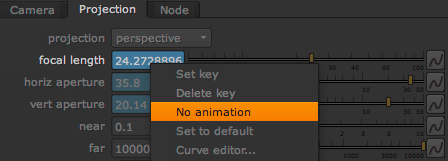
Remove Focal Length Link
In Camera node
Projection > focal length > right-click > No animation > confirm
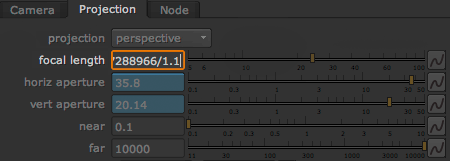
Divide Focal Length by Overscan Factor
After last digit, type /1.and your factor
My overscan is 10%, I divide by 1.1
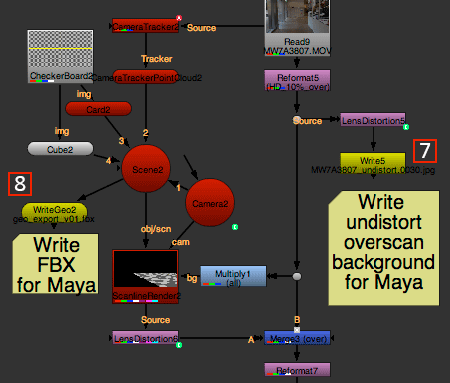
Export to Maya
Final check:
Reformat adds overscan and resize type is none
LensDistortion for Maya is undistort
and Scale to Format: Footage size
Camera focal length divided
Great! Ready to write out
Create Write and WriteGeo nodes
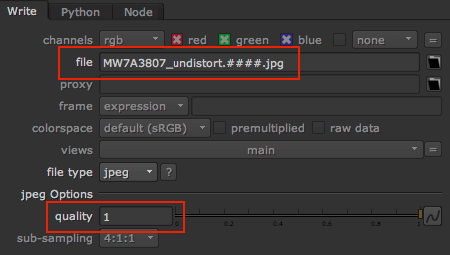
7. Write JPEG Sequence
Copy source footage name and add undistort .####.jpg
Set the JPEG quality to 1
JPEG is good enough as background in Maya
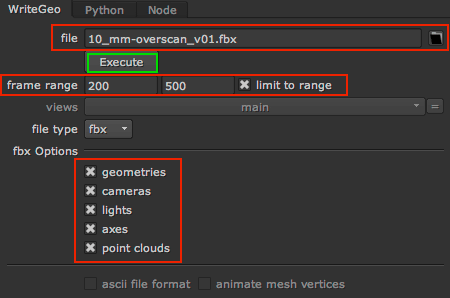
8. Write FBX
In WriteGeo node
file: Use setup name and add .fbx
frame range: Set your range
fbx options: Camera and geometries are a must, point cloud can be hidden here or later in Maya
All set: Execute!
