
3. Premiere Frame Rate Settings
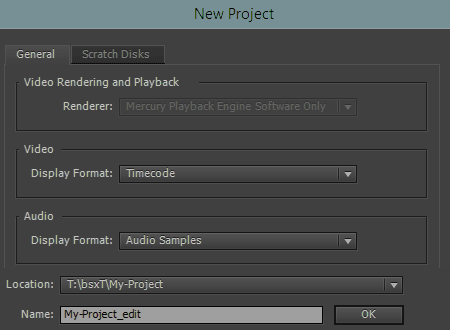
New Project
Leave defaults and continue
Unless you already want to specify the project location and name
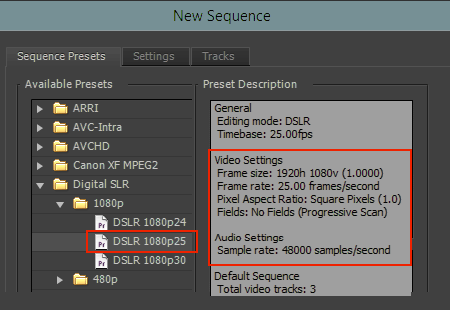
New Sequence
Use the preset DSLR 1080p25
All the right settings are already there
Sequence settings can’t be changed later
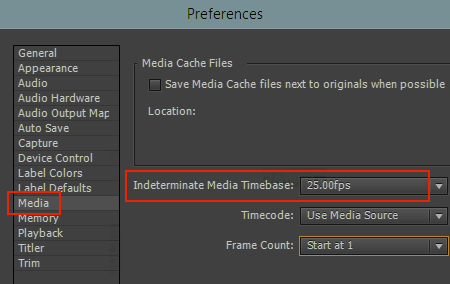
Preferences Default Interpretation
Edit > Preferences > Media
Set Indeterminate Media Timebase to 25
This defines how image sequences are interpreted by default. Very important to set this correctly, or else you need to change for every image file sequence footage

Import Sequence
File > Import
Tick Image Sequence
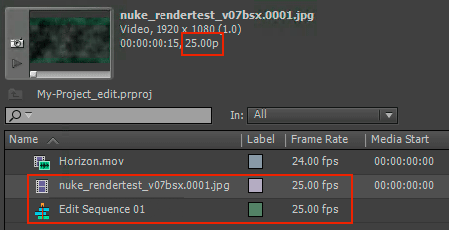
Check the Frame Rate
Great! Imported image sequence is 25 fps
Because we set Indeterminate Media Timebase in Preferences correctly
Image file sequence and Edit Sequence match: All Good!
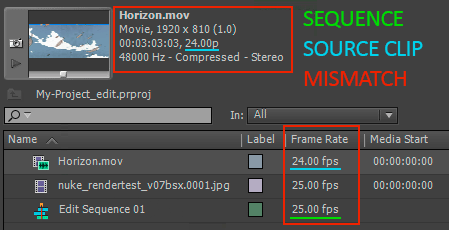
Frame Rate Mismatch
This source clip video is 24 fps
Source and Edit Sequence mismatch: Danger!
24 fps source in 25 fps edit sequence will cause stutter
We will change the interpretation of the source clip
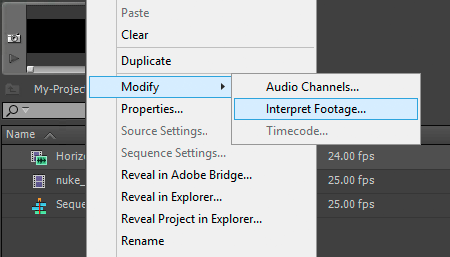
Changing Frame Rate Interpretation
Right-click on footage clip > Modify > Interpret Footage
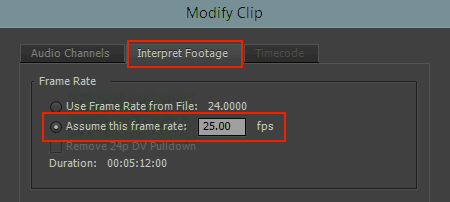
Specify Interpretation
Set Assume this frame rate to 25
We’re specifying a new frame rate for the source clip
Works for video and image file sequences

Check the Frame Rate
Source clip has changed to 25 fps
Source and Edit Sequence match
Now we’re all good, go edit!