
2.2 Quick S3D in Premiere

Quick S3D in Premiere
Create a new 1080p sequence
Use the preset DSLR 1080p25
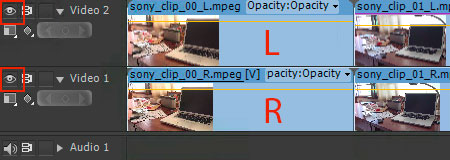
Add two video tracks
LEFT eye on video track 2
RIGHT eye on video track 1
Repeat for all clips you want to edit
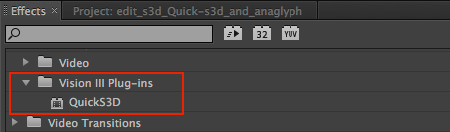
Add Quick S3D plugin
Under Effects > Video Effects > Vision III Plug-Ins
Drag on LEFT eye video track 2 clip

Quick S3D controls
Double-click on timeline clip, open Effect Controls
Display Type: Anaglyph
Primary Layer Channel: Left
Secondary Layer: Video 1
Secondary layer Channel: Right
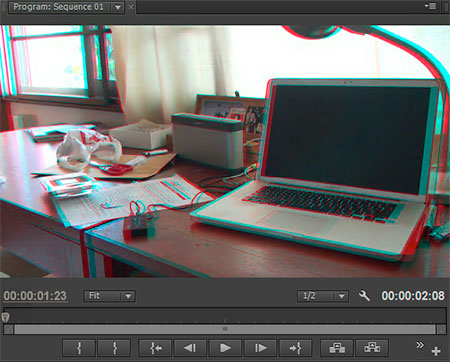
Check Result
Check the result in record monitor
Use glasses to confirm LEFT-RIGHT order is correct

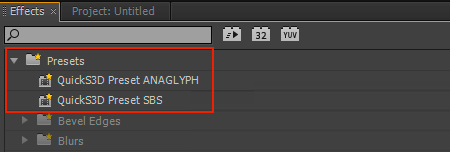
Save as Preset
Right-click on effect title > Save Preset…
Save one present with Display Type set to Anaglyph
Another one with Display Type set to Side-by-Side
Apply Preset
Select all clips on video track 2
Drag i.e. the Anaglyph preset on all selected clips

Toggle Flat – S3D
To change the output from S3D to flat for the entire timeline, simply hide the top layer with the Toggle Track Output

Toggle SBS – Anaglyph
To change output from Anaglyph to Side-By-Side for the entire timeline
If you already made adjustments such as Horizontal Shift, changing the output requires changing each clip’s
For 2-track timeline, change all effects on track 2: Select all clips, right-click on one clip > Remove Effects > Drag different present
Don’t mind working with 3 tracks: Changing output is only one click by hiding a track. Use one SBS and one Anaglyph track
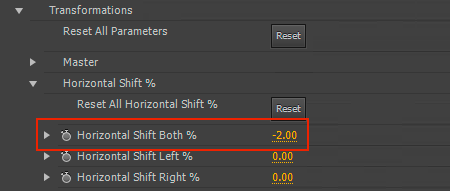
Adjust Horizontal Shift
To change output from Anaglyph to Side-By-Side for the entire timeline
For 2-track timeline, change all effects on track 2: Select all clips, right-click on one clip > Remove Effects > Drag different present
Don’t mind working with 3 tracks: Changing output is only one click by hiding a track. Use one SBS and one Anaglyph track
Toggle SBS – Anaglyph
To change output from Anaglyph to Side-By-Side for the entire timeline
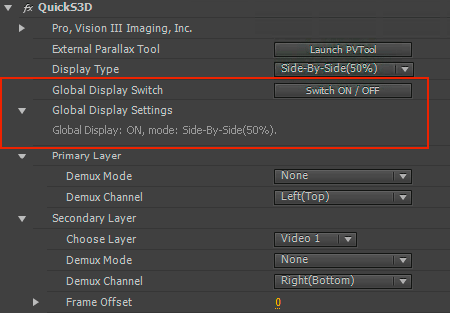
If the Global Display Switch is ON for all clips, one Display Type change should affect all clips. Check it out, if it works: Great. For me, it seems buggy and not working correctly in CS6. I had to change every clip’s settings…